Expanding your Shopify store to cater to multiple countries like the USA and India is a fantastic way to grow your business and reach more customers. However, it also means you need to handle different currencies, shipping, and taxes. This guide will walk you through setting up a Shopify store that works for both the USA and India (or other countries), helping you manage everything smoothly, from currency conversions to localizing your website for international markets.
1. Why Sell in Multiple Countries?
Before we dive into the how-to, let’s quickly explore why expanding your Shopify store to other countries is a great move:
- Larger Audience: By catering to different countries, you can significantly expand your customer base.
- Global Brand Building: Selling in multiple regions enhances your brand’s global presence.
- Increased Revenue Opportunities: You’re no longer limited to your home market’s sales potential.
- Currency Preference: Your customers can shop in their preferred currency, which boosts their shopping experience.
If you’re ready to grow internationally, Shopify makes the process easy with built-in tools and apps. Let’s get started with the setup process.
2. Setting Up Shopify for Multiple Countries
If you’re expanding your Shopify store to sell in the USA, India, or other countries, follow these steps to ensure a seamless shopping experience for all your customers.
Step 1: Enable Shopify Payments (or Another Payment Gateway) for Multiple Currencies

Shopify Payments is the easiest way to manage multiple currencies on Shopify. If Shopify Payments isn’t available in your country, you’ll need to explore other options like PayPal, Razorpay, or other local gateways.
How to Enable Multiple Currencies:
- Go to your Shopify admin dashboard.
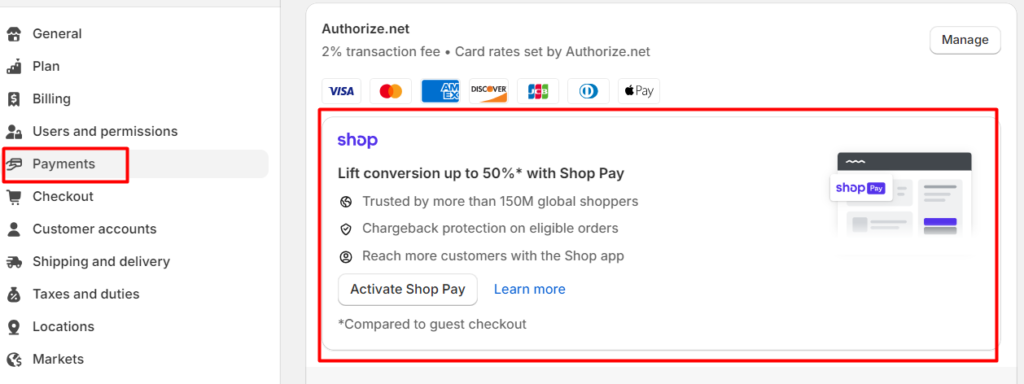
- Navigate to Settings > Payments.
- If you are eligible for Shopify Payments, you’ll see the option to activate it.
- Once Shopify Payments is activated, enable Multiple Currencies. Add both USD (for USA buyers) and INR (for Indian buyers), and any other currencies you want to support.Shopify will automatically convert the prices based on current exchange rates, but you can customize the conversion if needed.
If you’re using a payment gateway other than Shopify Payments, check with the provider to ensure they support multiple currencies. Gateways like PayPal and Razorpay often have these capabilities.
Step 2: Set Up “Markets” for Different Countries
Shopify’s Markets feature allows you to tailor your store to different regions. You can create a customized shopping experience for different countries by adjusting prices, language, and shipping methods. Here’s how:

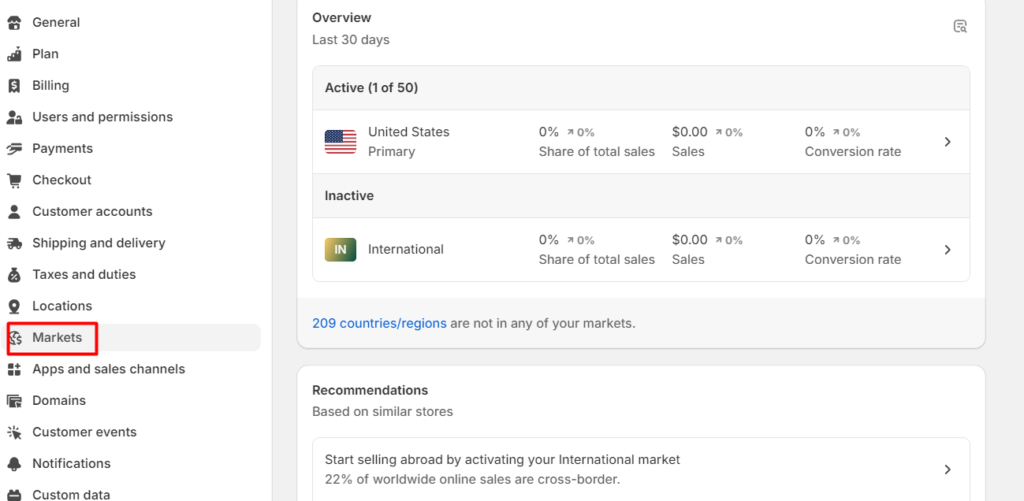
- Go to Settings > Markets in your Shopify admin.
- You’ll see a Primary Market (your default country). For example, if your store is based in the USA, this will be the USA.
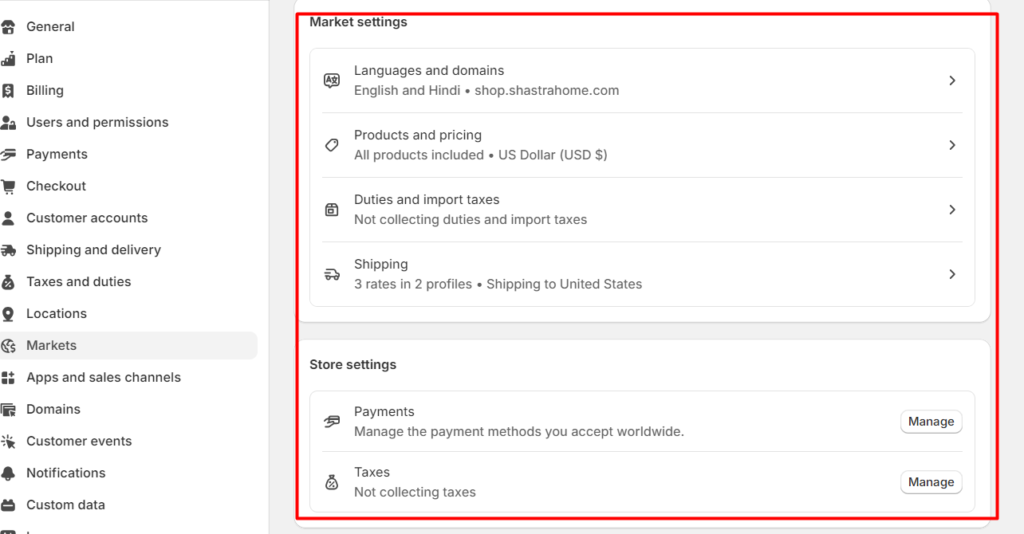
- Click Add Market and create one for India (or any other country).
- Set the country-specific details, like language, currency, and pricing. You can use Shopify’s automatic currency conversion feature or manually adjust prices for each market.
Step 3: Use a Currency Converter App
While Shopify Payments lets you support multiple currencies, you might want to provide your customers with the ability to switch between USD, INR, or any other currency manually. This is especially useful if customers from different countries are visiting your website.
You can easily add a currency converter app from Shopify’s App Store. Some popular apps include:
- BEST Currency Converter
- Auto Currency Switcher
- Currency Converter Plus
These apps allow you to display prices in various currencies. Many also have geolocation features, which automatically show the correct currency based on the customer’s location. This makes the shopping experience much easier for your buyers.
Step 4: Localizing Your Shopify Store
When selling in multiple countries, localization is key to making your customers feel at home. Localization goes beyond just currency—it includes language, taxes, shipping, and overall user experience.

a. Language Customization: If you’re selling in India and other countries, consider adding a translation feature to your store. Shopify offers apps like Langify and Weglot that can automatically translate your site into different languages.
b. Product Descriptions and Currency Symbols: Make sure your product descriptions are relevant to each market. For instance, Indian buyers may expect measurements in kilograms or centimeters, while USA buyers might prefer pounds and inches. Currency symbols should also be localized—INR ₹ for Indian customers and USD $ for American customers.
Step 5: Taxes and Legal Considerations
Every country has different tax regulations, so it’s important to configure taxes for each region correctly.
- For USA Buyers: Shopify can automatically calculate taxes based on the state in which your customer is located. You can configure tax settings for the USA in Settings > Taxes and Duties.
- For Indian Buyers: In India, you’ll need to set up GST (Goods and Services Tax). You can do this under the same Taxes and Duties section. Enable the appropriate tax rates for Indian customers so that you’re fully compliant with the law.
Step 6: Set Up Shipping for Different Regions
Shipping can get complicated when selling in multiple countries, but Shopify makes it easier by allowing you to create different shipping zones for each country.
- Go to Settings > Shipping and Delivery.
- Create shipping zones for the USA, India, or any other country you want to sell in.
- Set different shipping rates, depending on the region. For example, shipping within the USA may be cheaper or quicker than shipping to India, so adjust your rates accordingly.
If you’re using third-party logistics (3PL) services, make sure they support international shipping and are familiar with shipping to your target countries.
Step 7: Testing Your Store
Before you launch your store globally, it’s essential to test it to ensure everything works smoothly for both USA and Indian customers. Here’s what to check:
- Currency Display: Make sure prices display correctly in both USD and INR. Check that currency conversion works accurately with the latest exchange rates.
- Shipping Costs: Ensure that shipping rates apply properly to different regions.
- Taxes: Test whether taxes are being calculated correctly for customers in both the USA and India.
- Payments: Test the checkout process with different payment gateways to ensure that customers in both countries can pay smoothly.
3. Apps to Help with International Sales on Shopify
Shopify has a variety of apps that make selling internationally easier. Here are some that you should consider:
- Multi-Country Pricing: This app allows you to set different prices for different countries without needing separate stores.
- Langify/Weglot: These translation apps help you translate your store into different languages.
- Shipping Apps: If you want to offer global shipping solutions, apps like ShipStation or Easyship can streamline your logistics.
- TaxJar: This app automates tax calculations, making it easier to stay compliant with tax laws in different regions.
4. Final Thoughts: Going Global with Shopify
Expanding your Shopify store to sell in both the USA and India (or any other countries) can feel daunting at first, but Shopify provides the tools and resources to make it manageable. By setting up multi-currency support, customizing your store for different markets, and configuring taxes and shipping properly, you’ll be well on your way to building a successful international eCommerce business.
Take the time to carefully set up each aspect of your store, and don’t hesitate to reach out to Shopify support or use their community forums if you need help along the way. Happy selling!

